


A fairly straightforward job but these photos may be useful as they show how to access the spare wheel and what needs cleaning up etc.
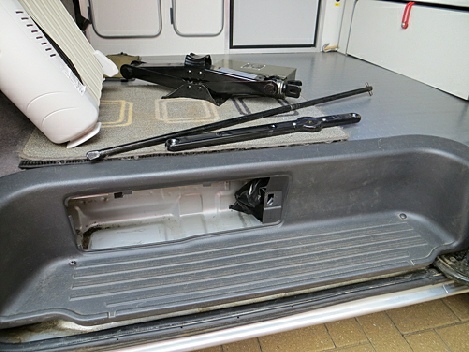
The spare wheel is hung underneath the rear of the vehicle on a cable. The cable is extended and retracted using the long bar and ratchet lever located with the jack, spanners etc. in the storage area behind the side door step:
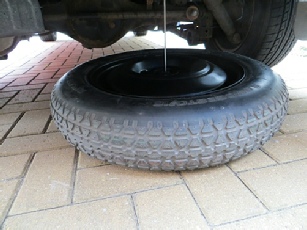
The wheel is dropped to the ground by unwinding the cable:
The wheel sits with the outside facing up. This means that it’s better protected than the back which faces down and sees all the road muck.
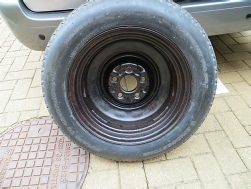
I cleaned off both the back and front of the wheel with a scraper and a wire brush, removing all the loose dirt and rust. I then used a liquid rust remover/stabiliser called ‘Vactan’ (advertised on ebay). This is a tannic acid/vinyl compound, is water soluble and combines with the rust layer to form an attractive adherent bluish finish. This is how the back of the wheel looked after treatment (see left).
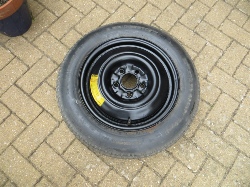
The front of the wheel was treated similarly but also then sprayed with grey high build primer, followed by coats of satin black. As the wheel is a ‘space-
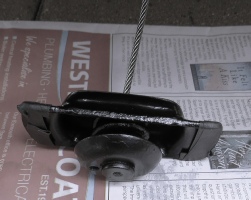
The cable which retains the wheel ended in a hanger which locates through the centre hole of the wheel. This was also rusty and again cleaned up, rust treated and painted as above. I masked off the cable when painting. This seems to be stainless steel and so doesn’t rust. Finally I wrapped the hanger flanges with some black self-

Finally the finished wheel was wound back into its location, outside surface up, after engaging the carrier end through the wheel centre hole.