


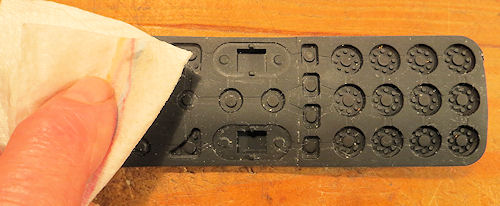
Nearly all TV or other remote controls eventually fail. First the buttons occasionally don’t work properly and you have to press them a bit sideways, then they only work intermittently, then they finally stop working altogether. The problem is that the contacts on the internal rubber membrane don’t make proper electrical contact with the printed circuit board, probably because of a build-
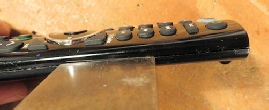
So it’s necessary to get inside the remote to clean the appropriate surfaces. If you can do this by undoing screws then you’re in luck. Unfortunately these days the outer parts are usually pressed together and kept that way by interlocking plastic lugs.
Unless there are obvious screws, the only way to get inside such devices is by carefully prising the top and bottom casings apart. You can ease this by first heating with a hairdryer to make the plastic less brittle then by inserting a thin metal blade, like a filling knife or spatula, between the parts and patiently turning and twisting it to try to get the pieces to spring apart. You have to take your time and once a gap appears, work along it to try to extend that gap along the whole length of the remote control. You can help the process by holding the open bit apart with your fingers, and by ‘attacking’ the opposite side too. You may hear a bit of creaking and cracking as you’re separating the two halves. While this is alarming, it doesn’t necessarily break anything and if it does, there are likely to be enough lugs holding the casing that one or two cracked ones won’t stop it clicking back together again later.
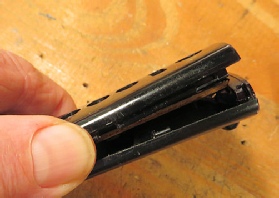
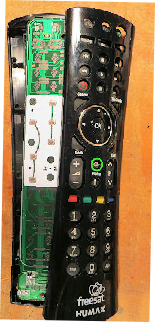
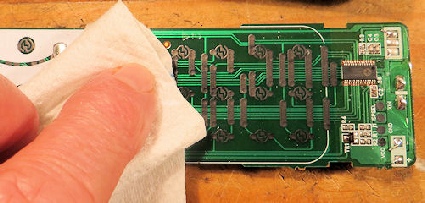
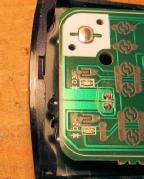
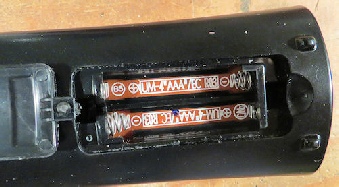
Inside, you’ll find a rubber membrane to which the buttons are attached and, below this, a printed circuit board which has the contacts which the buttons press against, as well as the IR led, the chip containing the codes, and the battery contacts.
You simply need to clean the mating surface of these components, using white spirit. If cleaning alone doesn’t help, the carbon layer on the button mating surface has deteriorated. You can refurbish by carefully sticking very small pieces of aluminium foil onto the button mating surface. (But see also the note below.)
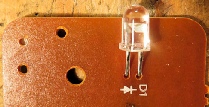
Then it all needs putting back together again. The printed circuit board fits back easily into the base of the control, but you need to take care to insert the IR led end first as the led protrudes towards the end window.
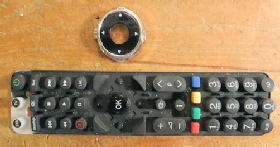
Locating the rubber membrane is more tricky as the buttons need to protrude into the holes in the top casing. Also the round ‘rocker’ insert, with up/down/left/right arrows, only fits one way round and must protrude through the top case hole uniformly all round. Doing all of this is easier if the rubber membrane is placed bottom-
It’s worth checking carefully that all the buttons are in place and that the battery contacts are located into the bottom moulding before clipping the two halves of the remote control back together again. If there’s a problem at this last stage you have to unclip the two halves to remedy this and that’s the hardest part of the project!
If you’ve managed to do all the above, you’ll be surprised to find that the remote control is now ultra responsive and behaves like new.


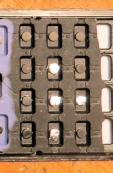

<< Five of the most used/worn buttons, on a different item, showing thin foil attached using contact adhesive.

Note added Sept 2018:
If the carbon film on the buttons is so worn that it can’t be salvaged, it can be repainted using a water-
Take care to follow the instructions, especially the need for thorough mixing. You need to apply the quite-